Sunday, June 16, 2013

A Few Little Droid Bits

After yesterday's marathon I only got a few things done today. Among them though was noting a couple of mistakes from the past few days: if you've studied the pics you'll have seen a piece of styrene I drilled out as additional support being test fit on the center ankle. On the BOTTOM.  Oooops! I did not need to re-drill holes in the frame base because the bolts that came installed on my center ankle are on the bottom! D'oh! I also bought the wrong M3 screws for attaching the motors to the motor mounts. Even though Teeces handily provided a chart of hardware needed for styrene droids, and even though I WROTE DOWN M3 12mm -- for some crazy reason I bought 30mm...and no way will those work! Ah well!!

Final mistake: I never ordered a beefy ankle set. Those used to be available from Keith, but he's not currently pouring resin parts. Bah! What to do? Well, I decided to yank off the ankles I'd attached (which I would have needed to bolt on anyway) and order Calvin and Brenda's nice new resin outer ankles that INCLUDE the beefy parts! I hate undoing work, but nobody else is providing the beefy ankles right now.


Ankles yanked, I put aside the legs to wait for my outer ankle order. I proceeded to doing some of the fine detail painting on the leg parts. Most of it I decided to do by hand:


I did mask off the cylinders though...


Aaaaand with that I have to take at least a week off to wait for parts and take care of real-life business. See y'all soon!

Saturday, June 15, 2013

What Six Hours Will Get Ya

Yep, you read that right: I spent six hours working on Dizzy today. You are about to see how much little one can accomplish in that amount of time!

First I must say that every building session involves a bit of housekeeping. It might be tidying up the area, gathering tools/paint/hardware/parts, it might be a tiny bit of research/reading, and it might be making a list of what one wishes to accomplish on that day. Usually it's all of that. During the session there is often sweeping-up, clearing out bits of trash/droid-waste, uploading pics for the blog...you get the picture! Often one is test-fitting, adjusting, test-fitting again, and then perhaps actual gluing or bolting or whatever. So very glamorous, I'll tell you!

Today included all of the above...over and over and over and...

So, here was today's droid to-do list:


I began by sorting out all the hardware I'd bought yesterday into carefully marked baggies:


 Test-fitting the nuts I'd bought for the center ankle. I'd stupidly painted the threads, but luckily got the nuts all the way on!


Next I started enlarging the holes to attach the shoulder hub to the frame. The force knocked one of the supports right out! It was fine though, as I realized the holes not only needed to be larger -- they needed to be in a different configuration!


So I started on that piece I'd knocked loose. Here you can see the original small holes alongside my pencil marks for the new holes:


Pencil marks on the frame part that did not pop out:


And to prevent pop-out on the other side I clamp the area tightly:


Glueing the hub sections together and test fitting the bolts: 


Test-fitting on the frame. None of the holes lined up perfectly so this was a VERY LONG PROCESS involving boring out the holes and skin area with the two files in the picture. 


Before final test-fit I apply the silver tape. This looks rotten. I no longer care. This is about 4 hours into the build. At this point I'm tired and cranky and silently cursing those with the ability to make perfect droids. Okay not really. But...I wonder how that is even possible!!? *sigh* Then I tell myself: at least I'm making a droid -- even if he's messy. How many people do this? Not too many, Liz!


I had to hammer the last bolt in, but one hub is on!!!! O.M.G. Yes, I danced a little.


On the other side I see a half inch gap. This side has always had weird gap issues. I don't want to think about what that could mean -- I know I made a mistake somewhere long ago -- so I figure I'll deal with future, um, leg issues down the road. :-(


Avert your eyes if you don't want to see a droid-bottom...

I flip him over and begin marking to install his skirt!


Something smart I did (yay!) : drilled, inserted bolts through the skirt into the frame, then taped them in place so I could put the nuts on later when he's right side up.


As feared, my resin ankle bolts are configured differently than the styrene one would have had. So, time to drill fresh holes. Those are unnervingly close to the old holes. 


So I prepare an extra layer of styrene support that I'll glue in later. Here it is being test-fitted on the center ankle.


I flipped Dizzy upright and secured his skirt. WoooOOOOooooOOOOOooo it's dark inside a droid!


Not pictured: gluing in his large data port. Also not pictured: knocking one of the FLD wires loose while trying on the dome. Still. STILL!! Look at him! So near done!! Squeeeeeee!


Cleaned up a bit, then thought of one last little thing I could do -- pin-striping the horseshoes: 


Aaaaaaaand I'm calling it a day! Whew! Now how much on my list did I actually get done? Hmmmmm. About half. Which is typical. I did add a couple of things and remove one thing. And so it goes! THUD.



Meltification

No, I guess that's not really a word. But it seems to describe well how styrene behaves when it gets quite warm. As in when the friction of a power tool is applied to it for any length of time.

I'd forgotten the days of melty plastic all over my expensive router bit back when I was cutting the frame...but oh how I was reminded yesterday afternoon!

Ah -- I seem to have gotten ahead of myself; let's begin at the beginning then!

The day began with a lengthy visit to the hardware store. My hardware store has the amusing moniker "Zinger." Difficult to forget! Yet, like all hardware stores it is like a siren to droid-builders: we are called inside, and time seems to vanish in that place, and without the watchful companionship of my husband I worry I'd be there still! Hunting, hunting for that perfect fastener...

Anyhoo, here's the day's haul:

If I've planned everything correctly there should be only one or two more visits for hardware before this little droid is done!

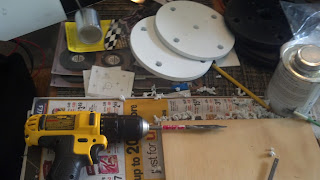
For the first building project of the day I resumed work on my FrankenHubs. Half-inch holes needed to be drilled through the circle pieces I glued together yesterday. This styrene is lovely tough stuff, and using a spade bit to drill by hand took a while -- long enough for...meltification!! Note the styrene "goo" that forms around (and inside) those holes as a result of the heat:


I decided to break out the old drill press, hoping the process would be faster and result in less melting.


Nope.


Using the drill press resulted in exactly the same amount of meltification, and oddly, was taking much longer in the set-up process. Also do note the clump of melted styrene clinging to the tip of my bit. That had to be scraped off every single time!! So, back to hand-drilling I went.

How I clamped the pieces (here I was also drilling out the 5/16 holes):


And how melty they always looked when done. I see much filing in my future! And clean-up of styrene  "goo." :-(


Since I had the spade bit on, I went ahead and also drilled the half-inch holes for the motor-mount pieces:


Now all this was actually much more work than it would appear in this short blog post; I ended up feeling quite tired -- and when one gets tired, one should put the power tools AWAY!  And  that is what I did! 

More SOOOOON!


Friday, June 14, 2013

Random Building

In order to make progress on the droid, many of my build days involve skipping randomly (and a bit frenetically) from one little bit to another. Yesterday was like that! 

I began with more painting. Rather than use the blue painter's tape, I thought I'd try masking with some heavy-duty post-it notes I had. Why do I keep trying to reinvent the wheel? Using tried practices would save me much time and frustration!  I guess it's my creative side... Anyway, here is the center foot all "masked" with stickies:


And here is the unlovely result:


Even worse on the back side. Well, there wasn't a "back side" until now!


Luckily, that was the only part I tried my masking experiment on, as all the other parts were just getting more coats today:


And, a little bit of artsy "weathering."


Next came work on my shoulder "FrankenHubs."  I'm marrying Dave Everett's design with the A&A hubs. First I glue some of the Dave E hub plates together. They will be drilled out to match the A&As.


Enlarging the frame holes to match the A&A hub holes:


Finally, I used some scrap to make a little support plate for the Large Data Port. This part of the frame seemed really flimsy, and I had no idea how else to get the LDP in. Let's hope this works!


The rest of my build time was spent thinking thinking THINKING. It took quite a while to figure out how I'd handle the FrankenHubs (and to list for myself the hardware I need to buy), and to plan getting the LDP in, and all the leg greeblies on. Today I'm getting myself to the hardware store to get fasteners, because STUFF NEEDS AFFIXING! And SOON! :-D

Wednesday, June 12, 2013

Catching up with the Blog!

Sorry to have been away again, but I was actually getting a bit of building done!  Some time in late May I began working on my outer feet. I began with the motor mount bits, some of which were a bit difficult to cut...


The standard use of X-acto blade wasn't going to work here, so I dug out my little saw:


...and promptly broke the blade!


Never fear! I found my spare blades and finished this bit up. I was planning to get straight into building the styrene feet when I heard a lovely rumor that resin outer feet might be possible sooooon! Since I'd decided those were what I wanted I put the feet aside while waiting, and went back to the legs.

This work was done today. I planned to bondo the rough sides and sand before painting, but I'd bought bondo glaze and not putty. Don't buy this stuff -- it's stinky and useless!


I also noticed that the glue I'd used did not want to hold these shiny bits together...the second the legs were out in the heat and humidity there was failure. 


I got out my new all-purpose Weld-On and fixed that area, and then affixed the skins rather than go out hunting for Bondo. I'll still need to get some at some point, but I wanted to move these legs along!


I also moved forward on getting all my remaining pieces sanded, primed and painted!


Here I sand the wrong side of the horseshoes! :-)


First layers of color for the leg parts: 


And first layers of metallic paints for the two legs:


I'm starting to feel as if leg assembly is around the corner! Wooooo!