Saturday, April 27, 2013

The Awesomeness of the Nylon Bolts

O, what a fine choice the nylon bolt were! Already I'm seeing many tiny boons...

First, in preparation for removing the heads so they might be glued into holes drilled into the surrounds, I marked the "good" end of each bolt -- the end that would not be cut, and would therefore still admit the screwing on of a nut. I'd made the error of gluing in the wrong end once before; sadness ensued as I yet again had to re-do work! Look how nicely the sharpie marks show up on these bolts!


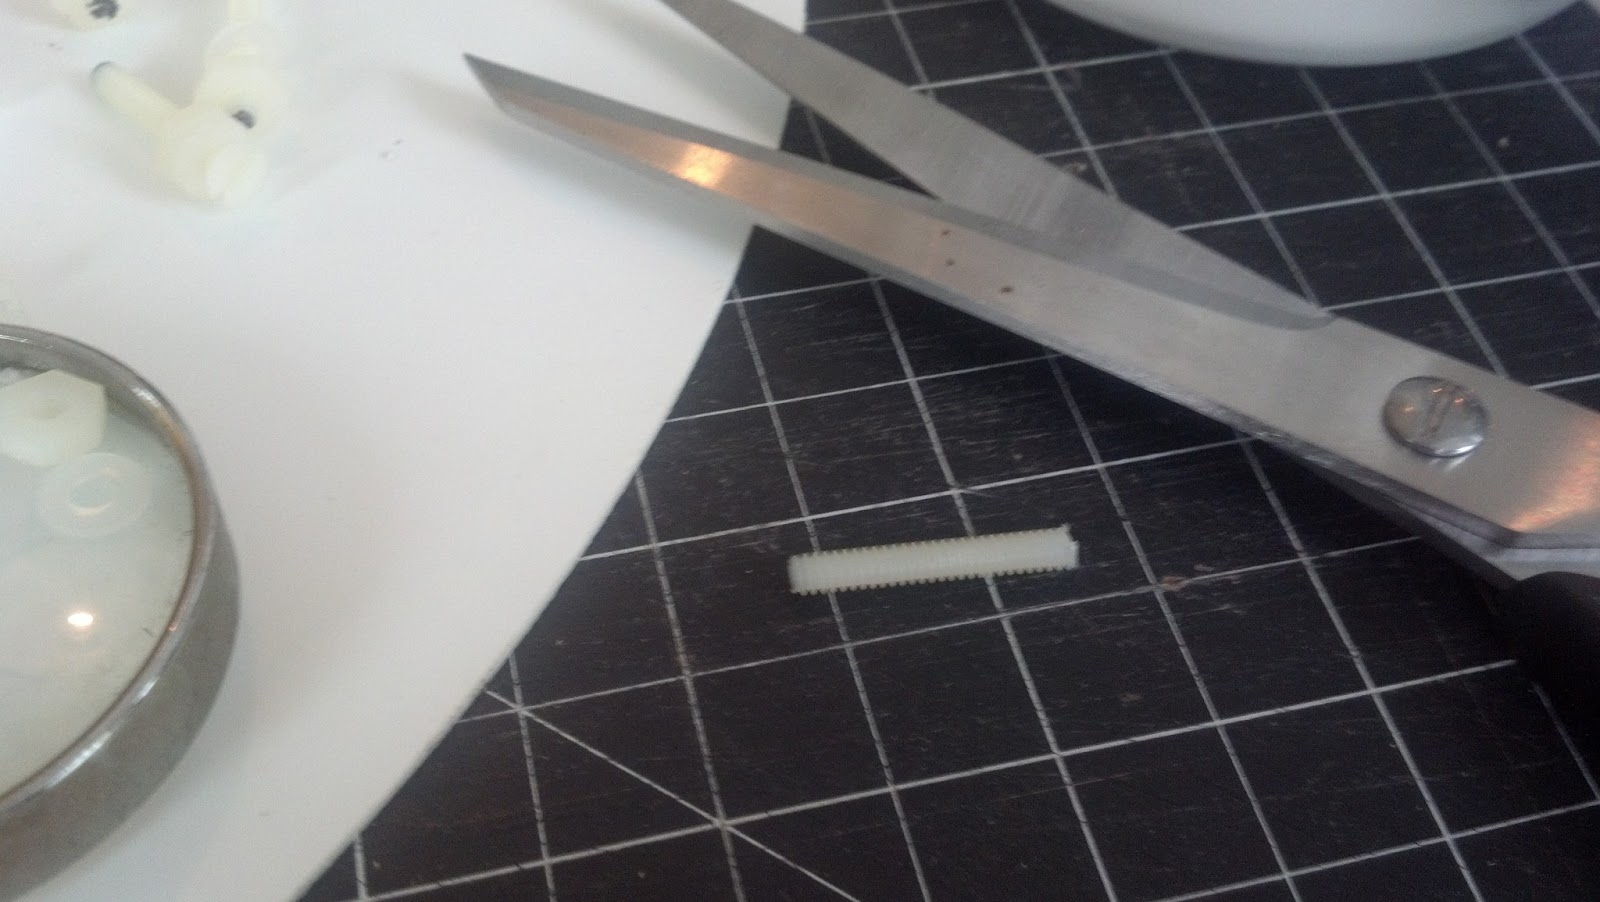
Once marking was done, sawing of the bolt heads commenced. Turned out the complicated "securely clamp bolt to table, attempt to saw wiggly bolt" method was not needed because...


the nylon bolt heads could easily be snipped off with scissors!! Woooooo! Yes, I'm easily pleased.


Sixteen bolts prepped for installing into the surrounds:


Drilling the bolt-holes into the resin produced these fun spirally ejection ribbons of resin residue. Poetic!


Here's a test fit of one of the bezels. I'm using the bezels to make sure all of the lights will look as straight as possible within the surrounds. One more neat feature of the nylon bolts is that they are mildly bendy, so there's some forgiveness there for any holes that were not drilled perfectly perpendicular to the surround. I'm sure none of them are perfect actually, as I did the drilling freehand!


Next up: glue! Unfortunately today is reeeaaaaalllly humid, so work had to stop. Still getting used to this Texas weather...hope to be back building soon!

Thursday, April 25, 2013

On the matter of installing all these electronics into the dome I had to do quite a bit of thinkin'.  Scott had advised not to have the circuit boards actually touching the aluminum -- yeah, I didn't know that! :-) I'd also not drilled holes in the inner dome as Victor's blog had wisely suggested; I planned to do that later, but in preparation for CVI last year I'd made that possibility much more difficult by installing the HPs and surrounds. I really didn't relish the idea of actually undoing all that work...

So I had two problems: create a barrier for the boards against the metal, and make a mounting system for them that was solid yet practical (in that I could easily remove the system if maintenance was needed).

I believe I've come up with a design for installation that will solve both problems: I'm going to screw the boards to thin sheets of styrene, which will then be welded to small styrene blocks glued into the dome. The "welding" is achieved easily enough using Weld-On, but the gluing of the blocks into the dome will require some trial and error. E-6000 comes highly recommend as long as it's allowed to cure properly so I'll be trying that first.

In preparation for all of this I needed to place the electronics into the dome and get all the wires under control. Here I'm using cocktail napkins to cushion them. We never drink cocktails at home so I have no idea why these were even around!


The other mounting issue involved placing the boards with the LEDs against their corresponding surrounds. I decided to use a technique similar to how I mounted the Radar eye: cut off the heads of bolts, glue them into holes drilled into the resin, and secure with nuts. I needed a fresh supply of all that stuff so I took several hours off to hunt for a decent hardware store in my new town. Aaaaand I had luck! I decided to go with nylons nuts, bolts and washers, just to be safe around the electronics. Here I'm test-fitting:


As usual, all things droid take at least 3 times longer than anticipated...but, slow progress is better than no progress!


Wednesday, April 24, 2013

More Shinies!


Upon my return from CVI, I'd basically just tossed all my droid stuff in a few boxes, which promptly got buried in the back of our junk yard utility room. After several major renovation projects on the house that utility room looked like a hardware store had exploded in there! I finally convinced the Mr. that it was time to organize it -- and it took a full day, but we did it! Droid parts excavated, I was ready to start the leg of the build that I like to call "finishing." As in: it's been 3 years -- and I'd like to enjoy my droid someday -- so it's time to buckle down and get in some quality droid-building time!

In the Droid Room during CVI Scott Gray, inventor of the JEDI Control/Display electronics system, had walked me through a few basic installation tip, and we'd gotten the FLDs going, and duct-taped into my dome. FLDs are the cool blue and white twinkly lights that shine out from the double rectangle windows on the front of R2 - FLD stands for Front Logic Display. 

We didn't have time to do more at the convention, but I left grateful to Scott for the instruction (and the invention!), and feeling much more confident.

Yesterday I decided to hook up the rest of the JEDI Display by myself. It took hours of careful re-reading of the documentation before I felt ready to begin, but once I'd gathered the needed tools and supplies it went really quickly! I decided to control the nest of wires by labeling them. Clearly. With GIGANTIC labels. :-D


I only hit one snag: After initial hook-up, I couldn't get the RLD (that's Rear Logic Display) to work. Hmmmm... I looked over all my connections with a magnifying glass, finding nothing loosely seated. Eventually I discovered the obvious: I'd forgotten to run power to it! 

The lights are soooo shiny! Tomorrow I have a plan to get them installed, and a nice rainy stay-at-home day on tap. Wooo! 


Monday, April 22, 2013

The EXTREMELY Long-Overdue Celebration Post!


Hello fans of the scruffy yellow almost-droid! I'm finally getting back into building my buddy, and I realized I'd never followed up with pictures from last year's CVI!

Let's get caught up then, shall we?

My droid arrived safely via the Droid Transport, and I wheeled him into the Droid Room at the Convention Center. After being assigned a spot, I got him into place.


It was such fun to watch the room fill up with Astromechs of every designation!


I'd ordered a banner stand and here I pose in front of it, along with my placard. Blurry pic courtesy of my husband ;-).


A friend dropped by with his nice camera and took this shot:


One of my goals for the event was to attempt to make some progress on the installation of the electronics, as I knew there would be a wealth of wisdom present. Below is my supply box -- I'd packed everything I imagined would be needed! Turns out I'd not bought several critical things, but JEDI Control Designer Scott Gray came to my rescue! 


Here began the fancy installation process, where I used a ton of duct tape to test fit stuff:


Thanks to the attentive tutelage of Scott, my droid shone for the first time!! I tried to buy him a drink later, (Scott, not my droid haha!) but he already had one...so, next Celebration I owe you one Scott!


There were several critical things I learned: 
1 - the circuit boards should not press up against the metal. I'm still working on how I'm going to resolve that long-term. 
2 - I need to take apart the entire dome and drill holes to install the electronics if I don't want to worry about them dropping out all the time. I think Victor's blog had a whole section on that! 
3 - It's pretty fun to be actually working on one's droid at these public events. It really brings it home to folks that we're BUILDERS!

This is how the work table looked while the lights were being installed:


And for the last day of CVI my droid sparkled!


Now that I'm all caught up, it's time to get back to building! It's been about 3 years since I started my astromech...and I really want to see if I can get him done SOON!