Monday, November 2, 2015

Episode X: Return of the Builder

Well, it's been a while! I took R2-DZ "Dizzy" to that convention in Austin -- the feet were temporary, but everything was operational! I took video with my phone, but that's apparently long gone. I do have one picture though, TA-DA!!!


Unfortunately, as I was leaving, Dizzy basically disintegrated. :(  All the structural problems, too much weight on styrene, and builder error...and Dizzy had to be wheeled out on a stretcher (okay, a hand truck)!

Needless to say I was pretty dejected after all that work. A VEEEEERRRY long building break was had. Then, slowly, I began to plot droid fixes. I decided to go with a wood frame, aluminum skins, and use all the other parts I had on hand for a re-build. I began gathering parts again. I attended another event with Dizzy in progress to show the kids that we actually make these little guys. This past summer we of the Central Texas Droids had a build day, and Dizzy's new body was started.


Today, I destroyed Dizzy v. 1.0 so that I could salvage parts. Yes, I felt like a Jawa! And yes, it was pretty sad...


Here we go again...


Destruction in progress.


GOODBYE OLD FRIEND!!  :'(


Sunday, November 10, 2013

This One Has a Good Motivator!

 ...if a good motivator is a deadline, that is! A convention at the end of the month, which will feature a Central Texas Droids table, is my deadline. I am set on having Dizzy rolling by then! I'm still waiting/hoping for resin feet, but I have everything else so it's time for a push to the finish line (he can run without feet, as those are just shells -- easily added later).

I began by finishing up the support that goes across the base of the dome. This holds some of the electronics and a slip ring. A little drilling and done!


I'd decided to add a door to the frame for access to switches. Here I'm affixing a hinge:


Alas, it did not quite work out. I'll revisit this later, as it's not critical.


Next it was time to actually glue in the utility arm boxes. I just used some scrap styrene to make supports:


...put them into position...


(I apparently decided to take many pictures of this exciting step!)


...and they are done!


 Next it was time to work on attaching his very heavy legs. I needed to widen the holes a touch, and reinforce the bulkheads. Boy the inside of his body has gotten gritty over time, and look how the glue has yellowed. *cue foreshadowing music here*


I decided to start leg attachment with his center leg. It was a real bear to do as one person has to maneuver the frame onto the bolts while the other has to aim the center leg. I roped the Mr. into center leg duty. Here Dizzy is supported in position using some of our art books:


I reinforced the bottom frame with some scrap and then tightened it up. 


Did I say the center leg was a bear to attach? Oh boy were the outer legs an adventure. It took several tries each time and the maneuvering was one of the hard parts. I am quite pleased with how his "replacement-leg-from-another-droid" turned out though! Still need to add more weathering to it.


The second of the outer legs was much easier to attach, of course! Another skill achieved that will never be used again hahaha!


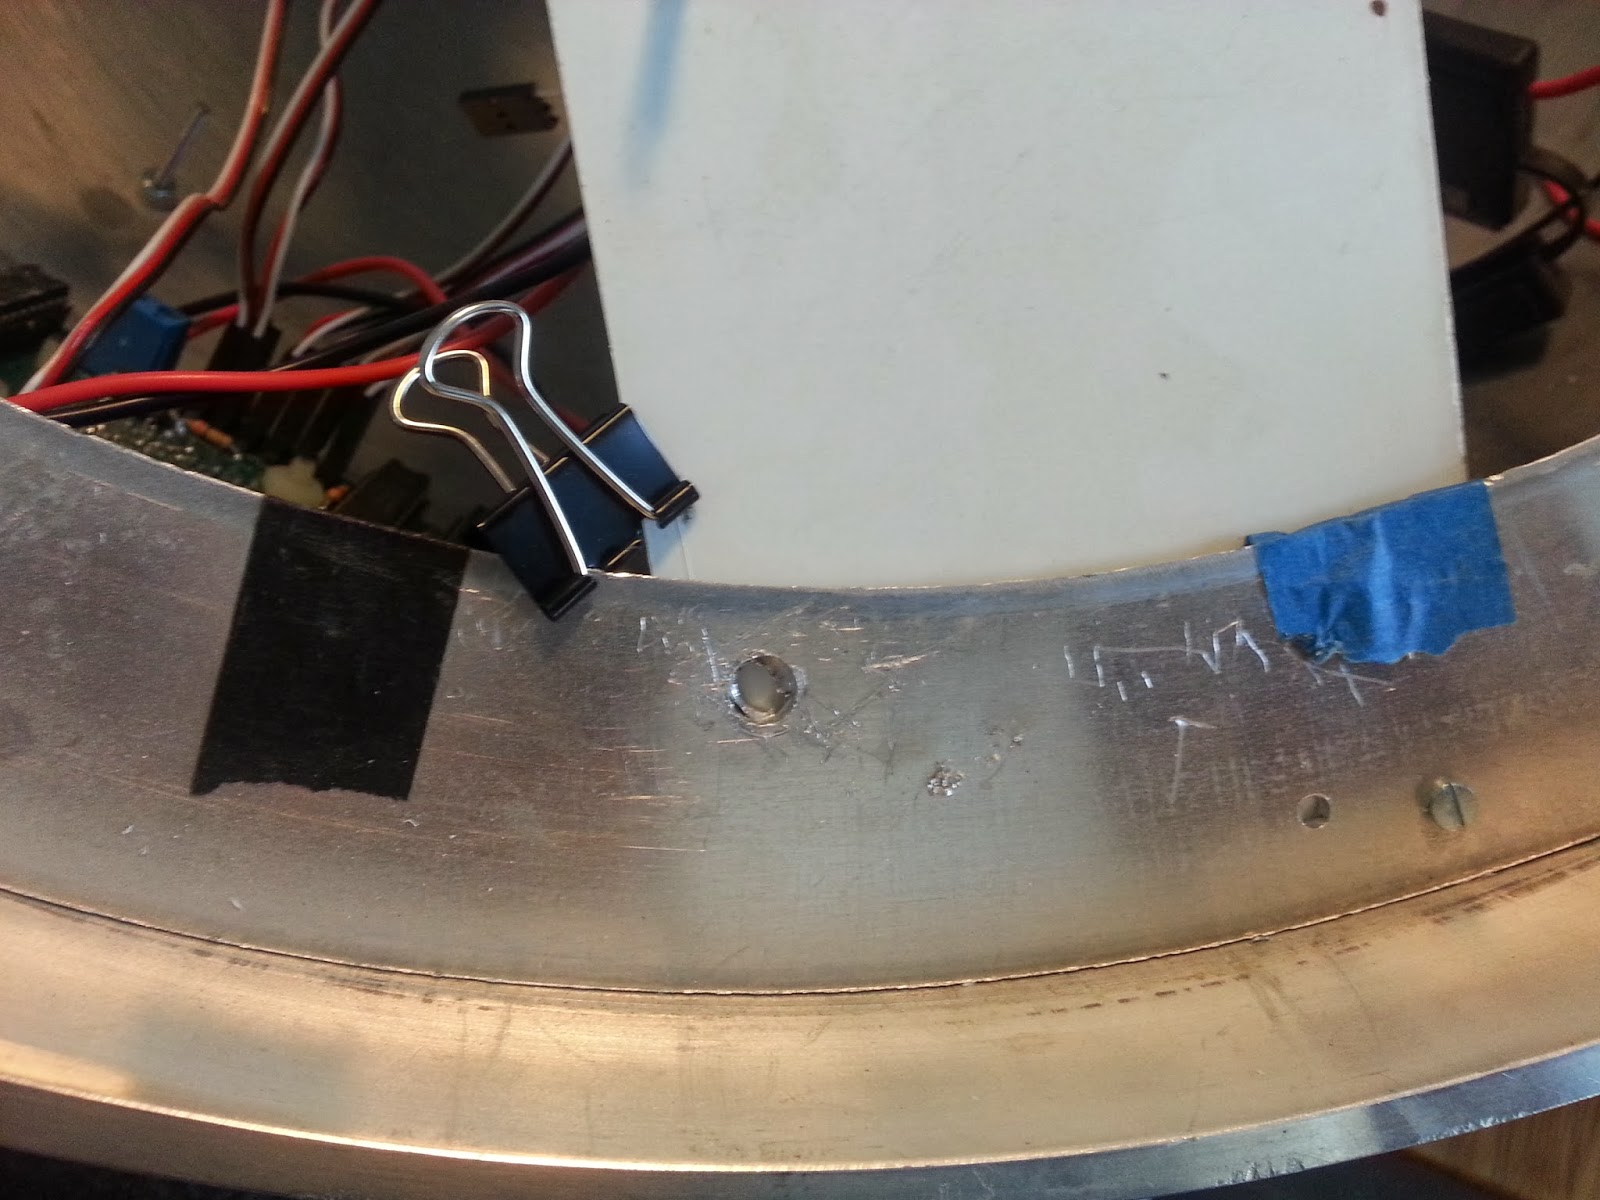
My aluminum arrived during the day and I began marking where to drill to make the motor mounts:


It took two of us, but we moved Dizzy up onto the kitchen table to make affixing the motor mounts easier. In the process we heard much cracking and snapping. :-( It seems I've added far too much weight to the little fella and his styrene body is beginning to fail!! Oh, dear...


I'm also able to see (from this perspective) that his base plate is flexing due to the strain, and this is messing with his leg angles...Oh boy!


What now? *sigh* Well, as a temporary fix I plan to try to reinforce the base plate with some aluminum, but I've had to admit to myself that I've overloaded the styrene frame, and now I'm going to have to switch to a more hefty solution. Looks like a wood frame is in my future! Wheeeeeeee!

:'(


Wednesday, August 21, 2013

It's the Little Things

Over the last few days I've been getting many small tasks done. But mostly? Mostly I've been researching the electronics part of droid-building -- a topic on which I know just about nothing! Happily, I'm bringing myself up to speed bwahaha!

Okay, back to the small tasks: I used a hole saw to create a hole for the slip ring in my styrene dome electronics support board. This is not a club standard part...just something that I hope will work!


Test-fitting the board again, and drilling holes in the dome ring for eventual permanent mounting. The board will actually flex a bit and be attached inside that ring.


Affixing more of the J.E.D.I. components. Double and triple-checking wiring!


Mounting my motorcycle speakers to brackets. I may just secure them to the base of my droid, room permitting.


Removing the bolts that came on my braided hose. That little saw did the trick easily. Unfortunately the outer diameter of the hose was a bit big for the little resin hose receptacles, so I had to order replacement hose. 


Still, I proceed: because I want to pass the hose through these little receptacles, and they were blocked on one end, I trimmed them back to where they were hollow. Again -- easily accomplished with that little hand saw.


More work undoing. :(  I decided I wanted a door for a charging port, switches and displays, so I had to use an exacto knife to cut one into the already-mounted skins. Luckily it came out pretty nice.


Following Teeces' blog and Dave E.'s patterns I glued "chords" to the back of the door to maintain its curvature. My chords look really rough. But they will do the job I think!


Finally, here's a pic of all my electronics "notes" -- print-outs of the plans of others, mods by me, and scratch-sketches of plans specific to my droid. I've had to order a small boatload of additional little electronics components, but I'm waaaaay more confident in my ability to get my little guy up and running by myself now! :-D


Thursday, August 15, 2013

[Insert Witty Blog Post Title Here]

So, four days of working on my droid to cover, and I'm thinking of just letting pictures (mostly) tell the story this time. Let me just say that working on the utility arms installation is a BEAR. :-)


I bought a ton of fasteners, but it turned out that bolts and washers that I had on hand did the trick!


Below are the fasteners I opened but did not use.


Below are the fasteners that I did not open, so get to be returned.


I had to carve out a bit of the LDP so the bolt could be accommodated:


TA-DAAAAA!!