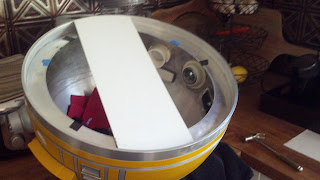
What better way to spend Star Wars day than by working on ones droid? Okay, lots of you were doing FCBD, and that's cool, but still! My husband is out of town, so to keep myself out of trouble (haha) I've been on a real roll with droiding! Wooooo!
As usual, I began work with changes in my plans; I realized I didn't have the proper glue on hand to finish off the legs (it's on order), and that I needed to both get that dome further along and get the leg resin parts painted, so I decided to move along with those two projects and leave the legs alone today.
I also changed my approach to getting the electronics boards into the dome. Rather than have them screwed into stryene, then glued into the dome as recently planned (thereby risking glue failure and electronics plummetage), I elected to try attaching them to the dome ring as I've seen others do. For some reason I decided this required removing the dome ring, which I'd thankfully never glued in. Or did I...?
Well, I'd never NEEDED to glue it in, because man that is one tight fit! I hammered away -- even warping the ring in the process, and still only got it about halfway off when I realized...
Duh! I could just attach the boards to the piece of styrene I was planning to stick across that ring to hold my slip ring! I'd been hammering away for about 1/2 hour at this point (and realizing that some silicone from my PSIs had actually seeped a bit into the join -- thus gluing the ring to the dome. Sorta.). I just love wasting time, don't you? ;-)
So, I took that piece of styrene outside to trim it up. Here I've staged for cutting and painting and trimming and sanding and:
Trimming the styrene to shape:
And test-fitting it. Eventually it will be screwed to the underside of that ring, which is actually the top side, but I think you get what I mean.
Anyway, I didn't want to waste the nice painting weather, so I went back outside to begin prepping the parts.
Like many builders, I have multiples of some parts. Here I'm comparing wood booster covers with resin ones. The wood ones needed more work, but were much lighter, so I went with those. First up -- they needed to be shortened.

It's been ages since I used this little jigsaw. It was one of the first tools I ever owned. *proud*
Some of the cuts were un-pretty. Luckily this will go on the off leg. What's the off leg? You'll see!
While putting away my jigsaw I saw an old familiar sight: styrene snow!! :-)
Next up was some Dremel work. One of my annoyances with the Dremel is how sometimes the collar will pop off when one is trying to change tools. Here I have to use a clamp to remove the collar. Meh!
I know: first world problems!
I'd had to review this blog to check whether I'd washed these resin parts -- yay for keeping a blog! There was indeed photographic evidence that these were clean. I guess I'd never noticed the rest of the prep work needed though...lots of extra resin bumps and such from the mold process needed trimming. Using my Dremel cutting tool and a hacksaw I labored along, cleaning parts up.
More trimming...
Taking some time to get the first layer of primer on some of the parts:
More detail work -- fine-sanding some edges. Before:
After! (Now repeat x 84ish)
A second layer of primer applied...
And some "aging" on my hoses while I'm outside...
Now comes the sad part! There is always a sad part. My drop cloth was rather old. And apparently quite fuzzy. Bits of fuzz embedded themselves onto every. single. part. Waaaaaaaaah! Guess who gets to sand each part thoroughly and do this all over again really really soon! AFTER I get a new drop cloth! Me! Me! I do!
Feeling a bit low after all that work down the drain, I returned indoors to try to "finish" that dome electronics install. After all the thought I've put into it, it should be a straightforward process, right? Well sure, if you are not me!
Well, some things went right: the bendy nylon screws made installing the FLDs and RLD a breeze.
But using that cross-piece of styrene to affix the controller boards was not so easy. Even though I measured carefully there was pulling on the part of the wires and it looks like I'll have to re-drill those holes elsewhere. Not pictured: wires pulled loose, and wires found to be too short. :-( Oh, Liz!
I temporarily put the JEDI LED piece here; eventually it will be in the body of Dizzy. I also decided to show off my latest injury: while hammering the dome ring back into place I hit my thumb! Woo!
And so ends another day in the life of your humble droid-builder. If I've inspired you to at least avoid my mistakes then my job is done. For today at least... See you soon!


Your blog was one of the first I discovered before I started building, so it's great to see you still updating it (even if it's a bit sporadic!)
ReplyDeleteIt's a great read :) I think a lot of people don't post their mistakes, so it makes them look all cool and like they're clever know it alls ;) We know the truth though... right?
Droid building is 90% learning how not to do things lol. Keep up the good work :)
Thank you James! Your blog is quite fun too -- I've finally updated my blog list to include it! :-D
ReplyDelete